Adding a Torque Box
This is probably the first "modification" in the project that's not strictly by-the-book. I'm going to add a torque box to the passenger side of the car, even though Ford didn't do it back in The Day. Two good reasons to do this. One, because it's a great way to make the chassis stronger - and two, it's a fun excuse to say "torque box" over and over.
A torque box is a chassis strengthening component that ties the frame rail to the outer rocker panel. Basically it's just a triangular box that keeps those two pieces from moving independent of each other.
The early model 65-66 convertiles got two, one on each side, coupes and fastbacks got none. In '67, fastbacks and coupes got one on the drivers side. The 1968 Mustangs were the first year to get torque boxes on both sides for all body styles. Up till then, only the convertibles got both of them. Ford should've done this in the first place, but I assume it was a cost-cutting measure to leave it off the fastbacks and coupes for as long as they did.
The beauty of this is that the '68 chassis are the same as the '67, so it should fit just fine. Except that almost everyone who makes this upgrade reports having to really struggle with fitting the new metal because after years of flexing, abuse, use, and general entropy, there's a little slop in the chassis interfaces where the torque box gets installed. There's always one guy who says his torque box just "dropped right in", but that's the exception. I'd say prepare for a fight.
Free advice: get the two-piece box. Yes, it costs more, but it fits better and makes installation easier. This whole effort (prep, prime, fit, weld) took about 20 hours over the course of a week of stay-cation at home.
Here's the torque box on the drivers side, installed at the factory during the Johnson Administration:


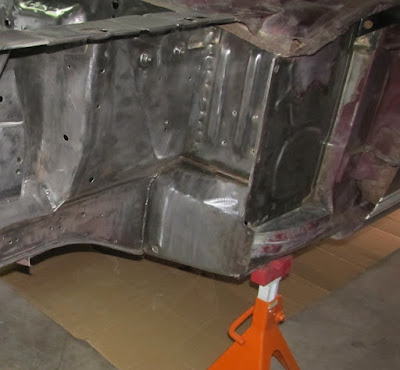
Here's where the torque box will live on the passenger side, bridging the gap between the outer rocker panel (left) and the frame rail/floor support (right). Don't be distracted by that ugly patch in the toeboard - it's a good butt weld that I didn't obsessively clean up as part of my anti-OCD therapy. The car is still up on the jig, with supplemental jack-stands for "just in case".

First thing is to remove the little brace inside that ties the toeboard to the outer rocker panel. 6 spot welds hold it in.
I needed to cut a slit in the toe board to get the inner part of the new torque box to fit in the proper place. The slit is a little wider than I would have liked, but seam sealer on the inside will fill the gap.

Primed all soon-to-be hidden surfaces, while keeping welding locations in clean bare metal. I've officially given up on using weld primer as all it does is contaminate my welds and make them less pretty. I noticed the clean metal welds are smoother without it. So my new strategy since the frame rail repair is to prime near, but not on, the actual plug welds.

"This is my torque box. There are many like it, but this one is mine." The piece on the right (inner) butts up the to the toeboard and provides mating surfaces for the (outer) piece on the left. This is the more expensive version, about $75, but it's a solid piece of well-formed 14 gauge metal. I scuffed the e-coat and shot some epoxy primer on it before installation.

Inner piece fit in place and welded in.

The outer piece here shows where all the welds will be holding it in - along the top, sides and bottom, plus some bead welds along the floor support and frame rail, all per the weld & sealant manual.

The outer piece needed a LOT of persuasion, both clamp and hydraulic, to get it properly placed.

Here's the back of the box at the floor support.

This is the interface between the outer piece and the bottom of the rocker panel. Super critical to get good penetration here. Since the inboard part of the torque box has so many more welds, it's easier to get it good and tight there. But since the outboard side has so few welds, this is where the action is.

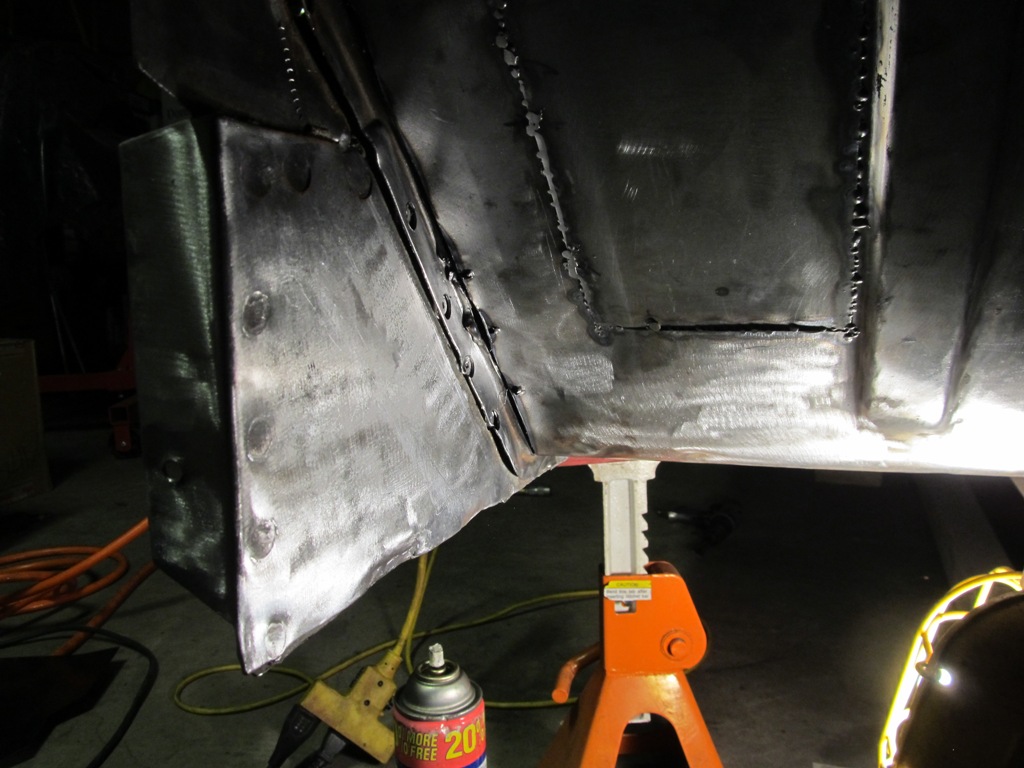
And here's the finished product. Seam sealer will be used along the top at the outer toeboard interface and the inside gaps as well. It's obvious now how much this helps tie the front end structure together, but I wanted to make darn sure the car was square before installing this. That's why this piece as installed after the frame rail/floor support.
There are still some small details to clean up on the front end before it's "done", but this was the last big piece I'd planned on doing up front. I still need to install some braces in the lower shock tower pockets and do the Arning Drop for the new passenger side shock tower.
Remember how to eat an elephant: one bite at a time...
Comments
Post a Comment
Moderated and checked, albeit infrequently. Humans with real questions get answers, bots with spam get derezzed.