Interior Disassembly, part 2 - Interior trim panels and headliner
[This took place over several weekends because of all the pics and notes we were taking.]
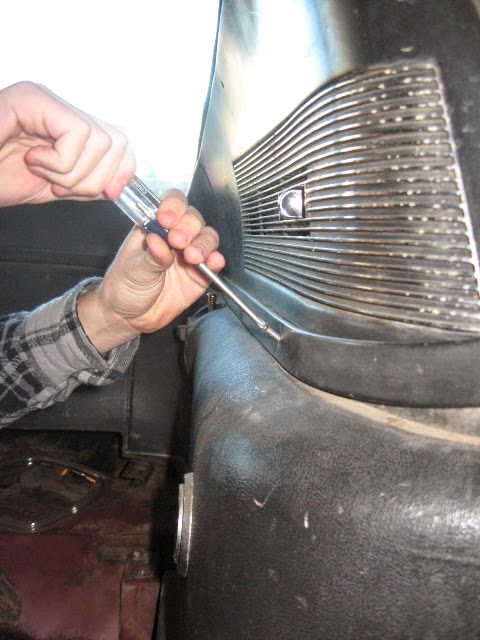
There are trim pieces around waist of the interior in the rear. They cover the joints of the upper and lower trim panels. Like all pieces in this car, they are not a true 'black', but actually 'charcoal black', a very dark grey metallic paint used in Mustangs in 1967 (possibly others). Be sure to note this when refinishing parts in a 'black' interior car.

Here, my helper removes the screws holding the trim pieces.

Same thing on the other side. In the light of day, you can start to see the years of accumulated dirt, dust, and (I think) cigarette residue all over the interior panels. The upper panels are smooth, but the lower panels are textured - which makes cleaning and refinishing a challenge.

In the Fastbacks, there are two metal trim pieces over the roof in front of the rear glass. Under this piece is the rear bracket for the upper console.

Upper trim is out - the headliner has some minor punctures all over, but this one is the biggest.

And now the upper vent side panels can come out, passenger side first. These are made of fiberglass, but the vent inserts are metal/chrome pieces. And mine are pitted pretty bad. Since it's very expensive to rechrome parts, I may just by a good reproduction.

Drivers' side vent panel comes out just as easy.

Here they are, ready for cleaning, close-up pics, and packing.

Next up, removal of the trap door in the back. This panel separates the trunk from the passenger compartment and, in some models, can be unlatched and swing up out of the way. The latch and the two hinges are all that hold it in place.

Badda-bing, it's out! See, anyone can take a car apart! The panel is metal on the back face and will need refinishing. The front is hard plastic I think, and textured like the rest of the lower interior trim. A lot of these originals are found with speaker cut-outs in them. I'm lucky mine is in one piece.

Now let's get the upper console and headliner out...three screws hold the mirror in place. For the console, two bright shiny screws up front....

...an two more in the back are all that hold it in place. There's a ground wire attached to one of the forward holes, and the power lead comes through a slit in the headliner above the console.

Upper console is out. I love the brushed aluminium look of the console - after I spent half an hour removing years of cigarette residue off of it with Never-Dull. The vinyl and foam is in good shape, but the map lights will need some attention. Now, just start cutting that headliner out along the front of the roof line...

...and we find our second mouse nest hiding just inches above the drivers head. Looks like the varmints used the roof insulation to make a home. Another reason to be wearing gloves and a respirator while doing the tear-down.

The headliner is held in by three main color-coded rods installed in specific holes in the roof rail. Many pictures were taken, I'm only showing one.
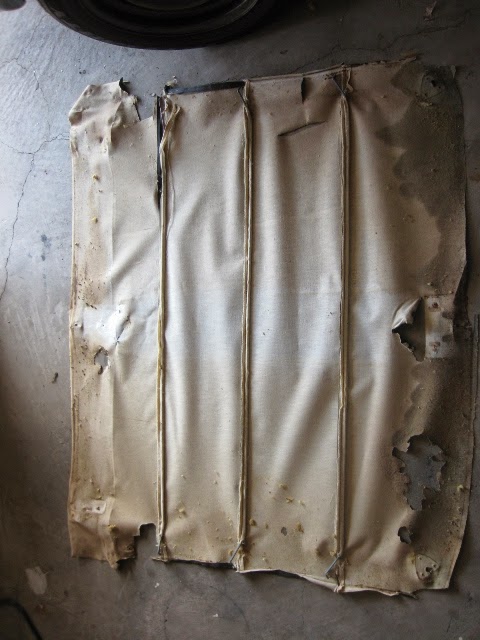
There it is in all its smelly, nasty, mouse-pee stained glory. Remember when I said you should keep all your old parts. We're gonna make an exception for this one. Bagged and tossed.

Here's the forward bracket for the upper console...

...and a close-up shot with an ugly truth - all the hardware (screws, bolts, brackets) in the interior of the car looks like this up close. It's surface rust, and it's starting to spread to adjoining metal. The hardware can be cleaned up, but it's pitted and strips easily when being removed. As a result, I've got a lot of hardware I'm not crazy about reusing. Plus, spending an afternoon cleaning old screws, will make you rethink this whole adventure. Thank goodness for AMK's model-specific master hardware kits. I bought small kit just to see what I should expect, and it's good stuff. So, I'll be back for more. You can find them in the catalogs for the majors like NPD, CJ's, etc.

Look! Smelly foam insulation pads between the headliner and the roof. Marginal utility, maximum nasty-smell factor. Gone. Modern replacements are available, so there's no need to keep this around.

Only the glue residue remains on the inside of the roof. If you look closely, you'll see surface rust at the very edge of the roof and then bare metal beyond that. Ford built up and THEN primed the roof assembly. Nice. It's funny to see the cost-saving measures in place for a mass-produced car like the Mustang. Sometimes we lose sight of the fact that these were effectively entry level cars and weren't built for a 50 year lifetime.

Shoulder belts are attached to the roof rail. Like the floor belts, they'll need replacing. Would YOU trust a seat belt that was half a century old?

Lower rear trim - worn, scratched, faded, dirty - is held in by some screws up front and some bolts along the bottom.

And here we have mouse nest #3 - and it's a monster. It was mostly jute insulation from the car, but I also found scraps of strip club match books and something that looked like little pieces of silk. Under all this mouse nest, no kidding, was an unopened box of novelty condoms (which I failed to photograph for some reason). How did it get in there, I can only imagine. If this car could talk, I bet it would only be allowed on air after 10 PM.

Drivers side comes out just as easy - but no mouse nest on this side.

The rear corner trim has upper and lower parts to it as well.


And once all that is out, all that's left is the fresh air vent assemblies on both sides. You can tell even behind all the trim, there is a lot of dirt/dust/grime all over.

Passenger side air vent assembly. The trim pieces are mounted to the little angled black brackets on the car structure you can see along the edge by the glass. All those came out, were marked, photographed, and bagged for later reuse.

Popping out the air vent is a matter of 8-ish bolt per side. Beyond is the exterior vent assembly.

The exterior vent assembly (which is really 3 pieces all sandwiched together) is held in by five nuts.

And now it's stripped. Here's what we're left with.

The rear floor is an unholy mess.

The rear of the cabin is better, just dirty. There is precious little evidence of rust so far. Astute readers will notice the gas tank is missing. Less perceptive readers will wonder why there is a sunroof in the bottom of the car. That's next week's post - trunk and gas tank tear down.

Where the big mouse nest was is pretty rough looking, but it all passed the 'stab-it-with-a-screwdriver' test. I considered just leaving it like this, but then decided that would be less interesting for you. My brother says I make everything complicated, and I would hate to start making my life easier now. So it'll all need to be cleaned, primed and readied for paint. Anything worth doing, is worth overdoing - right?
Comments
Post a Comment
Moderated and checked, albeit infrequently. Humans with real questions get answers, bots with spam get derezzed.