Fuel Line Installation
Now that the floor pan is freshly cleaned and epoxied, I can put the new fuel line in place. The old line was rusting from both the inside and the outside, so it can't be reused.
The fuel line in my car came out in two pieces. Here again, the 1967 model year had a few different revisions - early cars have a one piece line that runs the inside the transmission tunnel, whereas later models have a two piece line that runs down the length of the drivers side rocker panel.


The fuel line in my car came out in two pieces. Here again, the 1967 model year had a few different revisions - early cars have a one piece line that runs the inside the transmission tunnel, whereas later models have a two piece line that runs down the length of the drivers side rocker panel.

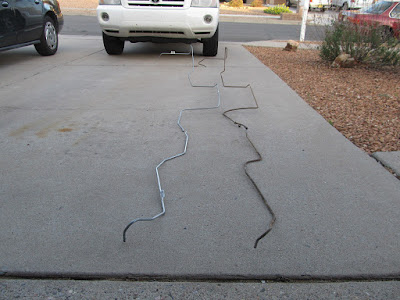
I got a replacement line set from NPD. The line showed up in an enormous box, but it's still folded in half for shipping and has to be reformed for installation. Fortunately. I saved my old line up on the wall when I pulled it out way back when. Now I can use the bends in the old line as a template for the new one.

A new fuel line hardware kit can be had from AMK. I never get tired of shiny new hardware. A lot of the old clips are not really well suited for reuse. The shop manual shows where all these bits go.

New front section of fuel line installed along frame rail. The D-washers on the steering box bolts back there had to be loosened and rotated to allow the line to pass through properly. The line goes through the opening in the torque box...

...and pops out the backside. A piece of ethanol-safe 3/16" rubber fuel line forms the junction with the second hard line.

The line doglegs out to the rocker and is held on to the floor with a butterfly clip.

This is the fuel line shield that is supposed to protect the line from flying road debris. Funny, though, the rest of the line along the rocker panel is just hanging out there in the breeze.

The end of the (fuel) line. The bends were really close right out the box and required very little tweaking along the way. It's nice when something just goes like it's supposed to for a change.

OK, I lied...THIS is the end of the fuel line. Really, this is the last few inches. From here, a little length of rubber line will connect to the fuel tank sender unit.
In response to Andrew's question, below, the last clip is a unique piece in the kit, and if I recall correctly, I placed it on the line, flat side facing aft, and lined it up with the hole and pressed it in till it clipped in place. It wasn't until then I realized I hadn't cleaned off the label on the fuel line and it's sort of too late now. Part of the therapy, I suppose. The hole is about 6 inches inboard of the edge of the tank (on the vertical flange that supports the fuel tank). Hope this helps.
Comments
Thanks for the write-up on this, made my fuel line installation way easier. One question for you. In my hardware package, there is one clip that attaches the fuel hard line to a metal flange right in front of the gas tank. (This would be right before the hard line connects to the fuel tank outlet). I cannot figure out how this clip actually attaches to the metal flange.
Can you comment on what you did?
Thanks
Andrew
Thanks
Adrian
Post a Comment
Moderated and checked, albeit infrequently. Humans with real questions get answers, bots with spam get derezzed.