Dash Removal

Here's a shot before we started to tear it all apart. Our car has the Deluxe interior, which came with the aluminum dash and door panel inserts. The console, carpet and seats are already out, The fire extinguisher was mounted through the floor with some self tapping screws. You can also see that the windshield is already broken and in the upper right you can see the hole in the headliner that let the mice have access to their gigantic nest.

The AM radio came out easy enough, and the next step is to get the dash pad out. There are several trim pieces up against the windshield that are held in with exposed screws and (supposedly) a mount of some kind on the sides. Here, my Apprentice begins the dissection.

OK, I want to show this shot for a couple reasons. First, you need to see the warp in the dash pad. I see lots of posts on forums telling folks to keep the pads if possible. Mine is warped, torn, and smells like a load of laundry that was left in the washer all week. So, regardless of how the reproduction parts look, we're not keeping this one. Secondly, the trim on the face of the dash, is held on by nuts on the backside. Resist the urge to pry on the edges. And, no, that Hi-Po emblem shouldn't be there.

Dash trim screws coming out.

The Instrument Cluster is held in with a couple screws into the dash as well as the wiring and the $*%*# speedometer cable. Pull straight out and set aside. Replacement instruments are really expensive, so be gentle.

See, this is gentle. Packed away in a box with lots of room.

It's nice having an Apprentice that can fit into these small spaces and who doesn't get lightheaded when he's upside down. The glovebox is out in a jiffy - hardware is on the bottom...

...revealing the A/C & Heater box assembly. Before that comes out, you'll need to drain the coolant out of the heater core and discharge the A/C system (Unsurprisingly, our system had no pressure at all after sitting still for 30 years). This is my only good remaining shot of the box and it's electrical and vacuum connections.

The HVAC control panel to the left of the driver is on the other side of some of those vacuum and electrical connections. Two screws hiding under a trim piece at the top. Like the cluster and the glovebox, the hardware is mismatched, even some flathead screws in there. Again, this makes me think that someone has been in here before. Pay close attention to the wiring and vacuum lines on the sides of this assembly before you remove it.

Here you can see the speedo cable end and the main cluster electrical plug. Removing both of these from the cluster was a difficult, painful process. Patience and a third joint in your arm will be very helpful here. Also notice the torn vent hose for the drivers side and all the surface rust just beyond.
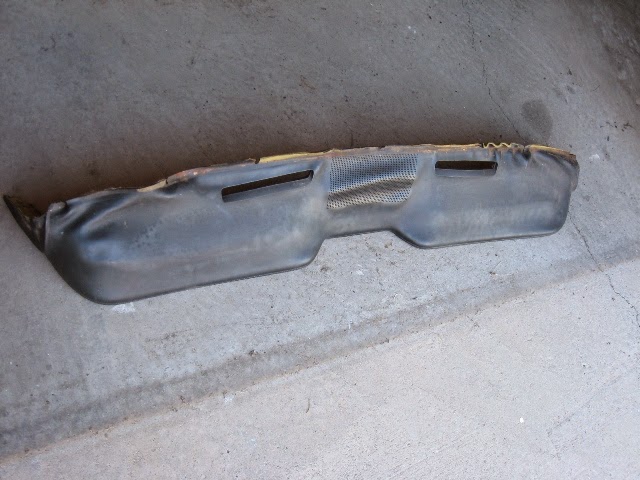
The nasty dash is out. Sorry, no amount of love is going to fix this poor smelly thing. Like all soft items in this interior, it simply has to go.
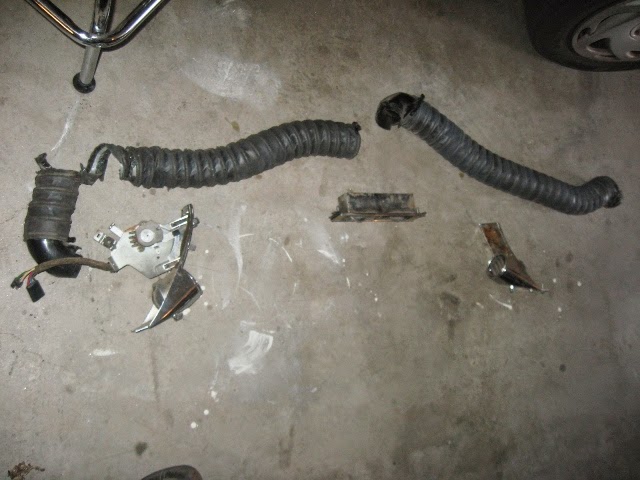
These are the hoses, vents and controls for the HVAC system. The hoses appear to be made of unobtainium, as I can't find them in any of the catalogs, but I have confidence the aftermarket has some sort of solution. My goal is to retrofit in a wholly new A/C system from Vintage Air or some other vendor. The old freon systems of days gone by really has no appeal for me to keep. This isn't going to be a period correct job. R12 is dead. Long live R134a.

I like this shot because it's one of those 'oh, what have I done' moments. The next shots were supposed to be of the main wiring harness attachment points and the harness out of the car. Those shots are gone. So, let me just say, that it was not a pretty sight. As a guy who's not afraid of wiring and connectors, that harness was a sobering mess. The idea of chasing endless shorts and iffy grounds, and wondering if the smoke I'm smelling is an electrical fire under the dash is just not worth it to me. So, instead of just refurbishing it, I'll be replacing it. You can get drop in replacements or, if you're really sick, buy a kit and wire your own harness and crimp your own connectors. I haven't decided yet which way we go - but I'm drawn to the hard way like a moth to the campfire.

The defroster duct; the center connection point for distributing air in the car. It's surprisingly fragile, and the plastic had broken at several of the mounting screws holding it in place.

The wiper motor assembly under the dash. It's the last major assembly to come out of the dash.

Boo-ya. It's out. Be careful of the orientation of arms other parts on this if you decide to refurb yours, it's very left-right picky.

Ah, that's nice. Now my Apprentice has room to work stripping out all that surface rust under the dash. Remember, one of the benefits of doing your own work is that your labor is essentially free. Child labor is even cheaper, because you get credit for teaching character-building skills like sanding.
Comments
Post a Comment
Moderated and checked, albeit infrequently. Humans with real questions get answers, bots with spam get derezzed.