Windshield Removal
- Front Windshield, which is already broken
- Rear glass, which is not already broken, and really expensive to replace
- Wiring harnesses, front and rear
While all these didn't come off on the same day, some of them don't warrant their own post. I'll likely regret this later when I'm slacking off from the car and want to make it look like I'm actually doing something. Again, I find myself short of good pictures. My camera skills are great at taking shots that are both too close and out of focus, but that's what shop manuals are for.
First, the windshield. It's cracked top to bottom and a little sideways as well. As I heard from Brett, he says the dents on the roof and the cracked windshield are all from the same event - namely, some joker walking around on the roof. I've had cars I hated and wouldn't even do that to them.
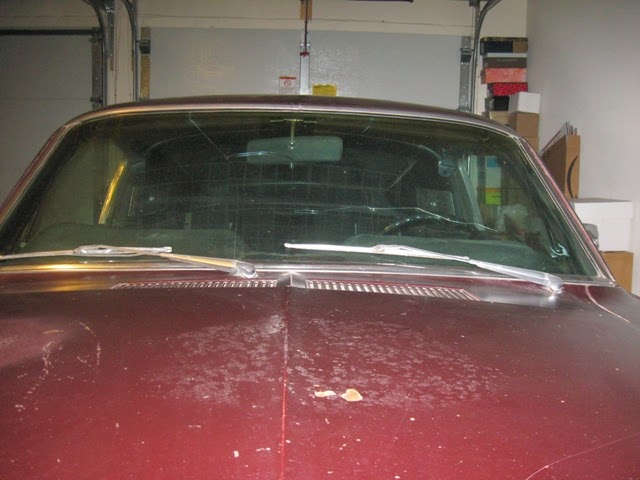
Anyway, the windshield is shot. Good news is this glass is fairly easy to get and is reasonably priced assuming you don't need that concours factory-perfect stuff. And then the challenge is finding a glass shop that will install it without breaking it. Add to this the gooey, gloopy, hocus-pocus way both pieces of glass are installed, and you have a recipe for trouble.
Here's the upshot: in order to remove the glass you first have to remove the windshield trim. So you have to SHOVE this little hook tool between the glass and the shiny chrome trim (that is both easily ruined by this process and impossible to find good reproductions for) and then LOCATE about two dozen little clips buried in the gooey glass sealant, then TWIST/PULL the clip to unhook it from the trim while not damaging it or the glass - and all by feel since you can't see what you're doing. Check out this 2 minute video that someone else made to see the horror that awaits you.
Since the front glass is already shot, I used it as a learning experience for the process so I can do it for the back glass.
So, here's how it went...shove in the hook tool, fish around for a clip, twist the hook around to catch the clip, slip off and start over. Fish, twist, slip, fish, hook, twist, slip, FRACK! Repeat as needed. It took me 4 hours to finally get all the clips pulled out and managed to save the 5 pieces of chrome trim from a bunch of perforations or bends.

Once the trim is out, I ran a boxcutter around the inner and outer perimeter of the gasket that holds the glass in the window frame. Then, with two helpers, gently shoved it out and threw it away.
And now we just have to clean this mess up...there are two kinds of glass sealant in there, and cleaning it out took another couple hours. But, as a friend of mine told me when I dragged the car home, "Well, it's cheaper than a twenty year-old."

And remove the clips from the frame...

And toss them - these are single use items in my book.

Next up is the rear glass, and the same drill: find and unhook about 24 clips without damaging the trim, this time with the added challenge of not breaking good rear glass (oooh, and you better believe that original glass with that little stripe that runs the length of it from top to bottom is internal-organ expensive!)


I was so excited this worked I forgot to take pics of the trim off the car. And there's no action shot because, for us, you can have either the shot, or the unbroken glass, but not both. Again, it took hours to get this done - you simply can't rush it or you'll break something.

I needed a way to safely store the glass in long-term storage as well as just move it. I worried that just carrying it wrong could cause it to break. So we built a little glass stand out of a pallet and some wood and pipe foam we picked up at Lowes Automotive.

Also around this time I extricated the engine bay wire harness now that the engine was out of the way, and the rear wire harness. The harnesses are crispy and the connectors are not exactly flight-ready, so they'll be replaced.
The engine bay harness - shockingly simple compared to a modern car.

The rear harness - even easier. I'm looking forward to wiring this car up after paint and body work.

The electrical plan isn't fully formed in my head yet, but it'll be near-stock with some upgrades for high-power lights, a modern charging circuit, extra circuits for whatever accessories I see fit, and a 'good-enough' stereo - because the real soundtrack for this car isn't supposed to come from the dashboard. Quite honestly, the more I hear about the future with driverless cars, the more retro I want to make this one.
Also around this time I extricated the engine bay wire harness now that the engine was out of the way, and the rear wire harness. The harnesses are crispy and the connectors are not exactly flight-ready, so they'll be replaced.
The engine bay harness - shockingly simple compared to a modern car.
The rear harness - even easier. I'm looking forward to wiring this car up after paint and body work.
Comments
Post a Comment
Moderated and checked, albeit infrequently. Humans with real questions get answers, bots with spam get derezzed.