Rear transition pan metal work, part 5 - priming the rear floor

There was a lot of surface rust down there, and I had to find out if there was any metal cancer hiding under all that. I was hoping to find clean metal under the grime, dirt, and rust, and for the most part, that's all I found.

Drivers side rear frame rail

Passenger side rear frame rail. Rust, and missing paint in many cases.

Looking straight up at the transition pan bottom. All these shots are after being cleaned of most dirt and grime with Simple Green and a scrubbing pad. Simple Green seems to work as well as the heavy duty degreasers I started with. (Some people get lucky and find pristine floors after a good cleaning. Not so here.)

Passenger side trunk drop off panel

Drivers side trunk drop off panel. Quite rusty.

Looking up at the drivers side trunk floor. How exactly does one strip that area?

Looking up at the passengers side trunk floor, you can see a textured undercoating and some black paint overspray from the factory. The concours guys would try to mimic this same pattern and texture. I need smooth and uniform to be able to sleep at night.

<Insert angle grinder noise here>

This part was not bad - it's overhead work, but wide open and easy to reach.

Passenger trunk floor - this was not fun.

This is the forward leaf spring mounting perch on the passenger side. Weak metal here would be bad news, so it's got to get checked on both sides.

Passenger trunk floor and trunk drop off.
Drivers trunk floor - this was probably the worst part. Hard to reach, hard to see.

Rear trunk/taillight panel support.

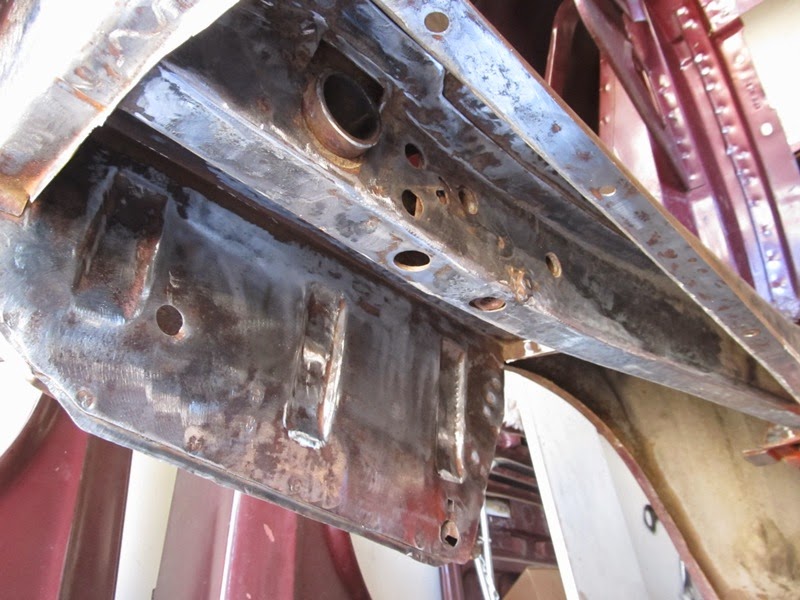
I did find a little hole in the passenger frame rail, and when I poked it with a screwdriver, it opened up quite a bit. After poking around and looking inside the rail, this appeared to be a hole caused by the traction bar rubbing against the rail, not rust. I masked it with tape and cut it out.

The offending piece of metal.

Patch installed and welds ground down.
After all the wire wheeling, there's the cleaning. Then the degreasing. It has to be clean, dry metal for the primer to adhere properly. Then masked off with paper and tape.
>> Finished primed surfaces are only as good as the prep work that goes into them. Take the time needed to do the cleaning right, or you may end up doing it again.<<
Inside the car, I used SPI Red Oxide primer on the floor patching work. While the Red Oxide does look similar to the original primer I've found around the car, I tried a test patch and I don't like the color as much as I thought I would - it's too bright for me. So I ordered some SPI Black to do the bottom of the car. For the record, a car like mine built at the San Jose plant in 1967 would have most likely had the Red Oxide color. Other plants may have had a dark grey 'slop' color, where the line workers at Ford would have mixed up leftover paint and used it as primer. I know black isn't factory correct for this car, but I don't care - my car, my rules.
The SPI epoxy is good about not having too much overspray, but I work in pretty cramped quarters, so masking is necessary. Also, I needed a gun that would spray overhead. I found one at Lowes Automotive that worked great for like $20 on the clearance shelf. The Vapor gun is the blue one on the left, and the Lowes gun is the one on the right.

The cup is side-mounted and can be rotated to allow spraying pretty much straight up. While the pattern isn't quite as nice as the Vapor gun I already had, it did the job just fine. [04/02/2016 edit: looks like this gun may be discontinued as a standalone item at Lowes, so pick one up now while you can.] I used about 20 ounces of mixed primer to do two coats over this section.
The money shot...

"...And I even like the color!"


Go back and look at that first shot on this post again. I'll wait.
Yeah, cool, right?
(all the blue is from the deep blue New Mexico sky reflected in the fresh primer.)
(all the blue is from the deep blue New Mexico sky reflected in the fresh primer.)
I know no one else will really ever see this, and once the rear axle goes back in, even less of all this will be visible. But I'm glad I got this wrapped up and it's nice to know there isn't a bunch of rust hiding under here.
Comments
Post a Comment
Moderated and checked, albeit infrequently. Humans with real questions get answers, bots with spam get derezzed.