Front Suspension and Brake Removal.
Many, many pics in this post. Now that I have a bunch of bent and damaged metal to replace in the engine bay, all the parts that hang off the front of the car have to come off so I can get the car on a frame jig. When considering whether or not to to a full teardown on this car, the entire front end was evaluated to see what could be saved. The short answer is "not much". So I kind of already expected to do this work.
Per the original owner, the car came with the Competition Handling package, which is even stiffer than the GT suspension, and naturally harder to get parts. So I plan on building the car back to an improved GT suspension package - same architecture as the factory, similar spring rates all around, but with improved and modern components in most cases. Call it "GT-plus".
The left and right sides are pretty much mirror images. I'll show the passenger side teardown, and then you can just hold your computer up to a mirror and play through them second time to get a feel for the drivers side teardown.

The front suspension and brakes, as they came on the car. It's easy to see that every rubber piece is cracked and worn, everything is covered in dirt and surface rust, and generally sad looking. Starting at the top, there's the coil spring which sits on the upper control arm, the spindle (where the brakes mount) and then a lower control arm. The hard-to-see pieces angled forward are the sway bar and the strut rod.

Here's a front-on look - this shows the lower control arm and strut rod better. The car came with disc brakes and you can see the calipers here.

Drivers side is the same setup. Nasty.

All of this needs some degree of help. At a minimum, the brakes need rebuilt and the soft parts like the brake lines and the torn ball joints are in need of replacement.

The car needs to be up off the ground to remove all this obviously. But there's a bit of yanking and pulling involved in tearing this down, so I used a 2x1 bar of 1/4" bar stock under the frame rails held up by a couple of jack-stands to hold the car up. Nice view of the lower components here.

First up - coil spring removal. I rented the inner coil spring compressor from Autozone to get the springs out. You'll find lots of advice on the forums about this. All I can say is this method worked for me. Make sure the spring clamps are well seated on the spring, and the center bolt has room to move down as you turn the nut on top. And go slow...

Spring clamp positioning

Once the spring was able to clear the suspension, I pulled it out and set on the ground the undo the spring compressor. Treat this like a bomb - it's the textbook definition of potential energy at this point. It has hundreds of pounds of spring force in it - if the clamp slips or the nut shears, all the force lets go at once. That's bad. So be very, very careful. Faintly visible are the two color stripes of paint run down the springs at the factory - the colors indicate type/rate of the springs for a particular option package.

With the spring out, the lower control arm needs to be held up with a jack to help unload the rest of the parts for disassembly.

Disconnect the brake hardline

And then unbolt and unscrew the softline assembly

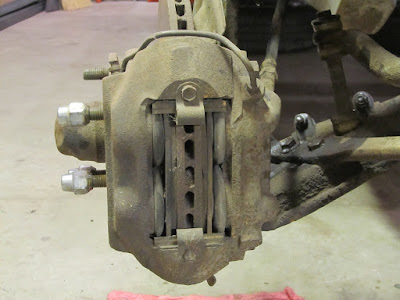
Check 'em out - original Kelsey Hayes 4-piston disc brakes. A pretty advanced package for the day. There are two pistons per side pushing on a a brake pad, thus the term '4-piston'. All four clamp on the brake rotor when you step on the brakes. I'm going to keep this setup and rebuild as much as possible because it's original and pretty cool. In '68, Ford went to a single-piston design which is a bit easier to care for. In fact, the '67s are special in the brake and suspension department for several reasons. So if your working on a 67, you're gonna want to know your build date to help decode what your car is supposed to have.

Loosen the caliper bleed valve and squeeze the brake pad back with C-clamps to bleed the old, nasty fluid out of the caliper. For the record, new brake fluid should look more like a drug test sample than a pancake topping. Here, as seen in the Tupperware on the floor, we have a full-on Maple Syrup specimen. Naaaasty. I wonder what this means for rebuilding the calipers?

Backside of the caliper view - those two bolts are what holds the caliper to the caliper bracket. I show this because it surprised me that it was only two bolts. By design.

Here's a shot of the same bolts on the drivers side. Please note the safety wire holding the two bolts in place. This is apparently factory methodology. I haven't used safety wire pliers since my days in Naval Aviation. I find this kinda cool.
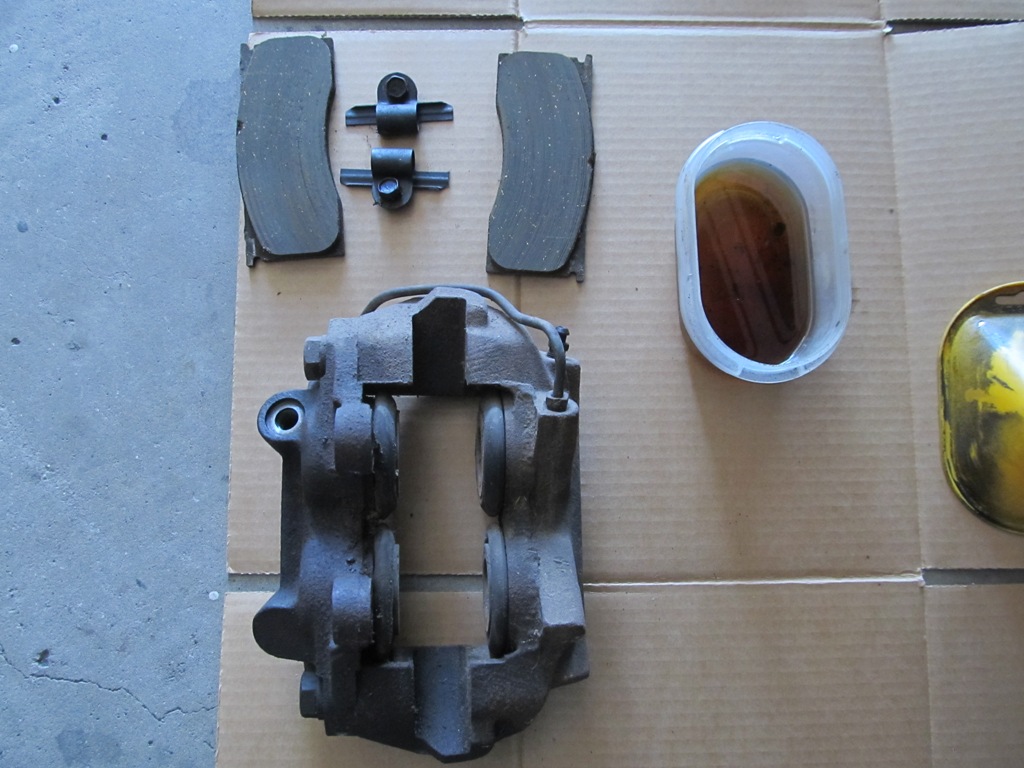
Caliper and pads. And maple syrup-like brake fluid. Ewwww...

Next up is the brake rotor. Pry off the dust cover cap, undo the spindle nut (say it again, but louder - SPINDLE NUT!) and set it all aside.

Rotor and hub hardware. Wheel bearing is two parts - one comes out with the nut, one is still in the rotor.

This leaves us with the exposed spindle (shiny!) and the dust shield.

Dust shield comes off with four nuts...

...and the brake caliper bracket comes off next.

Don't lose this. Disc brake caliper bracket - notice the 'K/H' marking on the spine.

I skipped a pic here - but the brake spindle is connected to the upper and lower control arms via a couple of ball joints. I use rented Autozone pitman arm pullers to break them free - apparently the old pickle forks are a tool of the devil and should be avoided. Anyway, clear view of upper & lower control arms still on car.

The upper control arm (UCA) comes off with just two nuts at the shock tower. Notice there are shims on the left hanging onto the mounting studs. Those are not supposed to be there on a 67 car. Probably there to compensate for the bent up front end I just discovered. The lower spring perch is still attached at this point on the UCA - right there in the middle.

On to the strut mount rod. Typically very hard to remove, as that nut has to go over all those exposed threads without jamming or stripping. I got lucky (and soaked all this stuff for a week before hand in Liquid Wrench) and they came off with just a breaker bar and a little PG-13 language.

All that's left is the lower control arm (LCA) and the sway bar. Just a couple of bolts and...

Blamo! This car is going nowhere anytime soon!

And here's the lovely collection of parts after we're done. Tip: keep everything and tag as DS or PS for later use.

Passenger side parts. Really just the same story again.

Passenger side, sans suspension and brakes.

Ditto on the right.
So, next up I'll get the steering stuff out of the car. All these springy bits need to get tagged and bagged for future use. When I'm done, I expect the suspension will really just look like a newer (and functional) version of what I just removed.
Comments
Post a Comment
Moderated and checked, albeit infrequently. Humans with real questions get answers, bots with spam get derezzed.