How to replace the trunk drop-off panel using a butt-weld
It's easy! Just cut off the old panel and fit up the new one. Set the welder to 11 and go for it! No, not really. But it's fairly straightforward. There was plenty of evidence that there would be some rotten metal in this area from day one, so this was not a surprise to me at all.
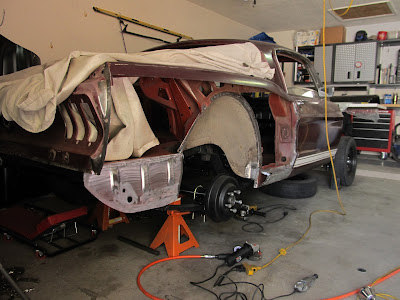
After cutting off the rest of the quarter panel, the trunk drop-off panel is exposed.
I could better view of the trunk area once I cut out the quarter panel skin. I'd primed all this metal when I did the trunk, but I kinda figured I'd be in there again later on.
This is the trunk drop-off. It's actually part of the trunk floor panel on this side, but because it sits behind the wheel well and stuff tends to either accumulate in here or road salt eats it from the outside, the metal is subject to rot. Once it was fully exposed, I used a wire wheel on my grinder to see how much of the metal was bad. The outside, exposed to the elements was fine. But the interior-facing side shown here was pocked with rust and weak spots all over, especially at the edges where the new quarter needs to be welded on. So it has to be replaced.
I lined up the replacement panel on the old panel just to see how close it was to original specs and screwed it into the old panel, as some folks have suggested you line up panels that are going to be butt-welded. Because I'm considering a butt-weld for the quarter skin, this was a chance to try the technique. I scribed a line for my cut and clamped the ends to keep the thing stable while cutting.
Closeup of the cut-line.
I used a whiz wheel on a die grinder to cut through both pieces. I'm not convinced this was a better way to cut metal. If I were to do it again, I'd use a jigsaw.
Removing the panel exposes the open space behind the trunk crossmember. There are three spot welds back here to remove in order to get the trunk drop-off removed. This area gets nasty due to road grit getting kicked up here, thus the rust in between panels.
Cleaned up and ready for primer and welding.
The replacement is sold as a fit for 65-70 model year cars. But all that means is that everyone has to do some mods to make it fit their application. In my case for a 1967 car, the lower and rear edges are too long and there is an extra hole that will need to be filled or plugged. Also the forward drain hole isn't in place, so I'll have to add that. I won't trim it till the quarter is in place.
Lining up the new panel on the old. I used magnets and clamps, and kept the gap as tight as I could. In most places the gap was smaller than my weld wire diameter (0.030"). I've tried the little screw clamps everyone talks about and found that they leave too large a gap for my clumsy welding skills.
The backside of the trunk was stripped of primer as well - remember, 'surgically clean metal' is the rule here.
Many small tacks later, it's in. I only needed the copper spoon for a few of the tacks where my gap was too large. I tried planishing the welds as well. but the space it really tight, so that didn't work as well as I'd hoped.
Ground down the welds and scuffed the whole panel in prep for priming.
Admittedly, that does look better, and I like that the metal is fresh and solid.
Here's the three plug welds on the crossmember that need to be redone. Clean, clamp, and burn.
Not the prettiest welds, but good penetration and no one will see these.
Two coats of SPI black epoxy primer were applied on both sides.
The gloss level is high since I had just sprayed this when I took the picture. It'll flatten out as the week goes on and look like the rest of the floor before long. But now we have new good metal for welding a new quarter panel skin onto.
On to the next step - installing the new outer wheel well.


Comments
Its been a while....any up-dates.
Phil
Post a Comment
Moderated and checked, albeit infrequently. Humans with real questions get answers, bots with spam get derezzed.