Installing the new Outer Wheelhouse
With the new trunk drop off in place, I'm ready to get the new outer wheelhouse put in. While I show here a fairly straightforward process, in reality I had the wheelhouse in and out of the car at least a dozen times for fit checks, both with and without the quarter panel skin. I was trying hard to not weld in a mistake.

The test fits showed one issue right off the bat - the outer wheelhouse pushed the new trunk drop off panel too far inboard when it was clamped in place. Pulling the trunk drop off to the right place would then push the wheelhouse too far out and it would then interfere with the quarter panel skin. The trunk drop off is located correctly based on the measurements from the old piece before it came off the car. So the reproduction wheelhouse will need to be modified to fit.


The test fits showed one issue right off the bat - the outer wheelhouse pushed the new trunk drop off panel too far inboard when it was clamped in place. Pulling the trunk drop off to the right place would then push the wheelhouse too far out and it would then interfere with the quarter panel skin. The trunk drop off is located correctly based on the measurements from the old piece before it came off the car. So the reproduction wheelhouse will need to be modified to fit.

The bottom of the wheelhouse pushes the trunk drop off too far inboard. This rear flange on the wheelhouse needs to be modified to be pulled in a bit.

I marked a diagonal scribe line to take about 3/4" out of the flange at the bottom, but leaving the top of the flange in about the same place.

Cut and rewelded the flange in its new position. Test fitting showed it no longer deforms the trunk drop off panel. I cleaned up the welds a bit, but this entire edge will also get covered in seam sealer and it sits out of sight in the trunk well.

I prepped the wheelhouse for epoxy primer by scuffing with a red scotchbrite. I also punched all the holes in the upper flange for plug welding to the inner wheelhouse still in the car. Holes are spaced at about 1 inch intervals.

Two coats of primer on both sides. Better than the E-coating it came with.

I also primed the inner structure and the new drop off panel.

Test fitting the outer wheelhouse. In preparation for welding, I cleaned the epoxy around the holes I punched, and once I was happy with the fit, I scribed the location of the new holes on the inner wheelhouse flange so I could clean those spots as well.

Prepping the inner wheelhouse weld locations. The factory put the inner and outer wheelhouses together by using a rolling seam weld around the whole perimeter of the pieces. Great for a tight, continuous joint, bu this makes it hard to take them apart, plus it's a type of weld that a home hobbiest is probably not going to be able to replicate. So I'm going to use plug welds. But a long string of plug welds will not be nearly as watertight as the seam weld was, so I'll need to run a good bead of seam sealer in the gap inside the finished wheelwell assembly.

New part clamped in and lined up.

I placed the skin over the clamped wheelwell to make sure it fits well enough.

Most of the stuff I find online about replacing this part is from coupes, not fastbacks, which have a different inner structure, so I'm kind of making this part up as I go. When I removed the old wheelhouse, I drilled all the way through the structural brace that holds the wheelhouse in place.The new outer wheelhouse slides in between the inner wheelhouse and the brace. This way I just plug weld the brace to the outer wheelhouse from the outside, and from the inside I weld the outer wheelhouse to the inner one. Plug welds all around. There are a lot of them, so it took a while to prevent warping.

Five welds at the newly-relocated rear flange. After I clean the welds up, this will also get a bead of seam sealer. The trunk drop off is right where it's supposed to be, so that's good.

Here's the inner brace welds for the wheelhouse. I cleaned up the welds a little and brushed some epoxy on them as well.

Seam sealer applied to the trunk drop off weld line and the lightly modified rear flange on the wheelhouse.

Per the weld and sealant manual, there is some sealer at the front of the wheelhouse where it meets the rocker panel.

Touch up primer all around

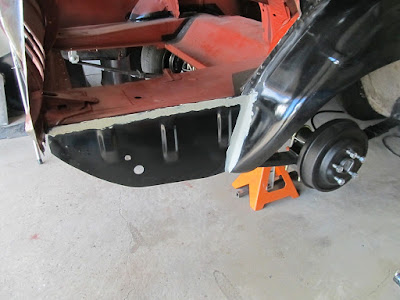
With the trunk drop off and outer wheelhouse replaced, its time to get to the Quarter Panel Skin. With any luck, I won't screw it up.
Comments
Jay
Post a Comment
Moderated and checked, albeit infrequently. Humans with real questions get answers, bots with spam get derezzed.