Rear floor and Transition Pan Assessment
So, recall when I tore the interior out of the car and the backseat looked like a crime scene?
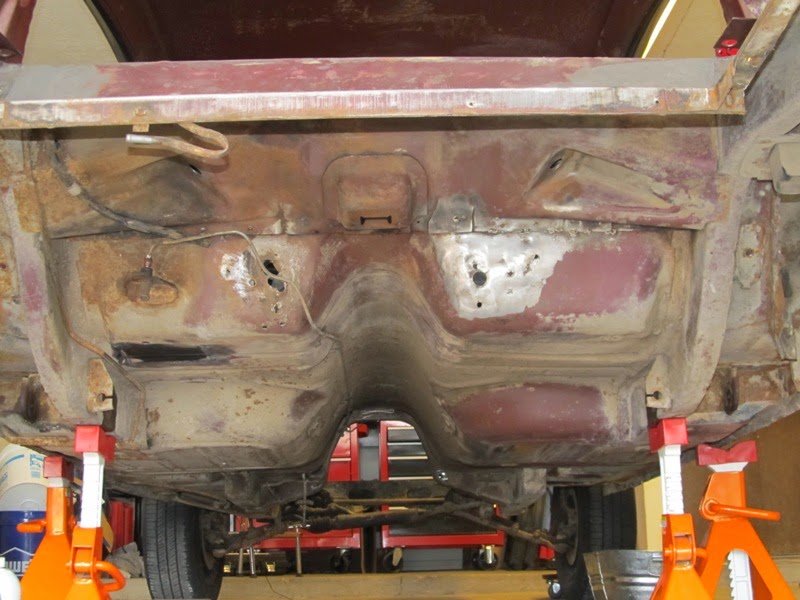
I need to provide a context image so you can even tell where in the car this is. This is the rear of the car, where the back of the floorpan meets the transition pan that goes into the the trunk. Essentially the backseat area:

(This lovely inspirational shot is actually this very car from "a few months in the future")

Looking at the bottom of the floorpan in the same area, there's more damage - several cracks, gaps, and those same holes through the floor where those huge lag screws were holding the dual exhaust hangers in place.
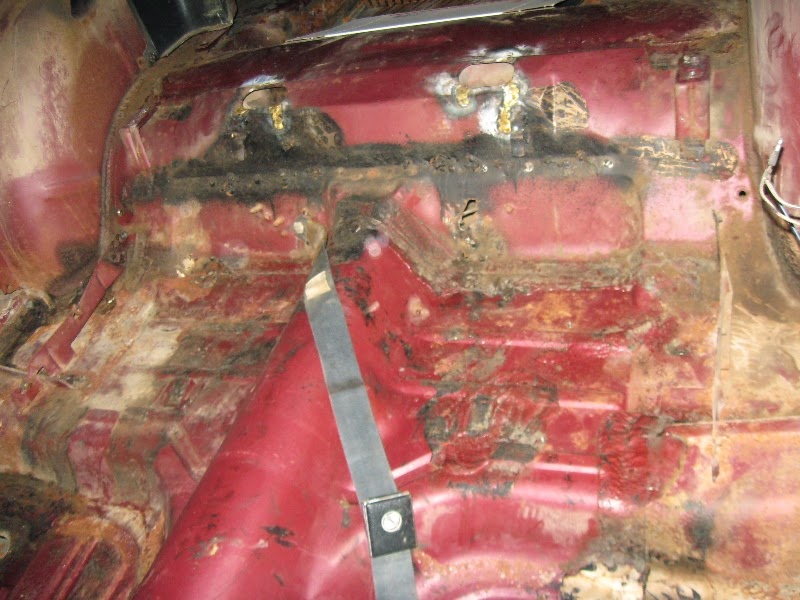
Here's the bottom of the drivers side floorpan (before cleaning). The seatbelt brackets that should be spot welded to the bottom here were in fact just held in with screw tension to the seat belt. Technically speaking, this would be called 'dangerous'. It certainly would not have held anyone in place in any accident. Also please note all those little screws poking through the metal at that horizontal seam (where the floorpan is welded to the transition pan)... that is not factory work.

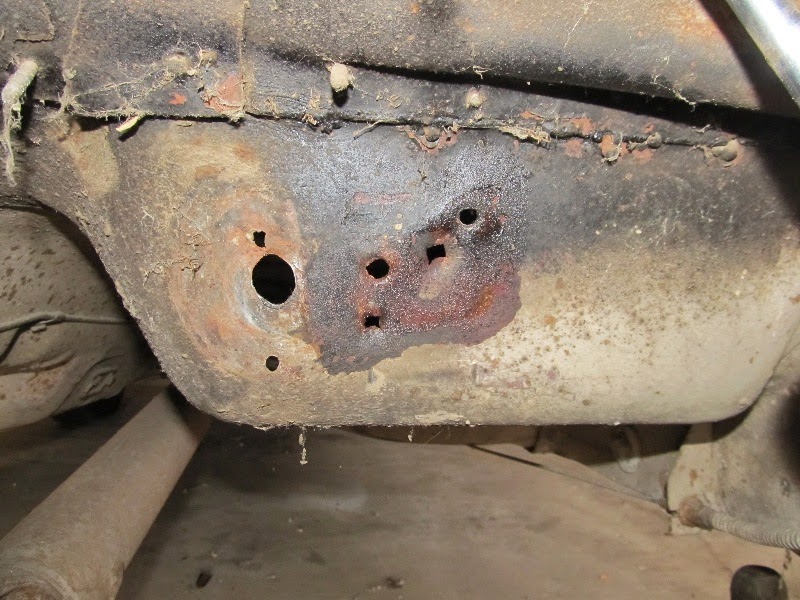
The passenger side of the floorpan, bottom view (before cleaning). Too many holes, no seat belt bracket, more screws, and in the upper left please note the cracks in the metal of the transition panel.
Cracks, gaps, holes - what can we learn here? First off, the lag screws that held the exhaust system in place that went through the floor (and the rear seat cushion) tell me that the dual exhaust is likely not stock. Mustangs equipped with dual exhaust from the factory also had a reinforcement plate installed to the floorpan (you can see them in Mr Miller's shot). This car has no such plates. But the plates are available to buy, and they get welded to the floorpan, so I'll just get those and put them in because I want to do a proper dual exhaust system and not have it pull giant holes in the floor. Again.
Secondly, the transition pan is such a horror of holes and cracks that there has to be a reason. The short story is that I think it comes from the air shocks I took off the car when the rear axle came off.
What's the problem with air shocks? Remember, the Mustang is a unibody car - not 'body-on-frame', like Dad's Chevelle (Elvira!) or other muscle cars of the day. In those cars, you can separate the body (where the interior lives and the shape of the car comes from), and the frame (where the engine and suspension mounts are). In a Mustang, the body IS the frame - the structure of the car has been designed to handle the loads and stresses of the engine and the suspension at specific points. (This is why if someone says they did a 'frame-off restoration' on a vintage Mustang, you should be very suspicious.)
For the early Mustangs, the rear suspension consists of a live (solid) rear axle and leaf springs with shock absorbers. The points that take the majority of the stresses are the leaf spring mounts fore and aft. The shock absorbers simply dampen the spring motion and the chassis movement, and help keep the rear axle located in place relative to the road - they are not meant to carry the weight of the rear of the car. Air shocks are not standard, fixed-height, fixed-rate shocks like the factory installed. Air shocks are just that - inflatable shocks that you could fill with air so you could lift the rear of the car up and change the ride height of car. Remember way back in the day when everyone wanted that cool jacked-up rear end in their muscle cars?
Air shocks are a problem for two reasons here because not only do they change the suspension geometry in the back of the car, but also if they're inflated too much they take the load off where it's supposed to be (the leaf springs) and put it where it's not supposed to be (the shock support/transition pan in the floor). The leaf spring supports are some of the thickest, stiffest metal you'll find on these cars, whereas the shock transition pan is not.

So, in my humble opinion, the air shocks that were on the car when I got it, placed a bunch of stress on the transition pan and likely was the direct or indirect cause of a lot of this mess.
The upper shock mounts have cracks, the upper shock mounting access holes have cracks that have been brazed as a repair, and in general it appears there were some real stresses that caused the spot welds to split and were then 'repaired' with a bunch of self-tapping screws and some globby-looking welds.
It appears that there are at least four separate metal patches that have to be installed, cracks to be filled, holes to weld shut, and panel gaps to close up. All this of course after it's cleaned up and stripped to bare metal. The good news is I don't have to actually replace the whole thing, just patch it up and put metal back in there. Plus, it's a great place to practice welding on the car as this entire area will be pretty much hidden from view once it's done.
The next few posts will detail how all this got done. Trust me, while I'm no expert, I'm much happier with the finished product. Stay tuned!
Comments
Post a Comment
Moderated and checked, albeit infrequently. Humans with real questions get answers, bots with spam get derezzed.