Drivers Side Fender, part 1
I could just purchase a new reproduction fender for $120 (which may not fit well), or a higher quality Ford original equipment tooling fender for $450 (which would fit better). In an attempt to preserve as much original metal as possible on the car, I decided to repair my original fender as best I could. I figured I was here to learn and try, not just shop and buy. All told, I have just over 50 hours in this fender over the course of about 6 weeks. Yes, I'm know I'm slow.

The inside of the drivers side fender - down in the bottom behind the wheel opening is the worst of the surface rust.

My obligatory sideways pic. The bottom of the fender is at left. Dented, rusted, and generally rough looking. Notice all the little bondo worms at right where the original MUSTANG lettering and badge were installed. We're going with the GT badging and stripes, so there are some holes to fill.

Need to remove the 289 badge on this side as well.

Strapped down and stripped bare

I used the same Makita 9227C sander with 80 grit paper here as well. Makes quick work of old paint. Notice we have one repaint on this car - you can see the layers of primer, sealer, paint, primer, and the top coat which is a repaint - a little more purple than the original vintage burgundy.

At center is a cluster of holes that are from rust, not badges. That's not good.

Stripping down to bare metal to start filling holes. 3M stripping disks work well here.

Another sideways pic. But the holes are filled. I use a copper spoon on the outside and fill from the inside. I don't worry too much about grinding the inner welds down as they aren't visible and I don't want to burn through to the front from overzealous grinding.

Outside of the fender - holes are filled and the area hit with a DA sander using 80 grit paper. Success here is a slightly depressed area that can be filled with body filler at paint time.

I removed the Hipo 289 badge up front and found only 6 holes - less than the 8 I found on the passenger side. Still 6 more holes than I need.

Clean the area behind the holes to make sure there's no rot or rust in the area prior to welding.

Holes are filled. They need to be cleaned up and ground down still before priming.

Now that the badging holes are filled, I start work on the lower area that has rust damage. Although I swore I wouldn't media blast in the driveway again - I did it anyway. It's the best way to clean pitted metal to really assess the damage.
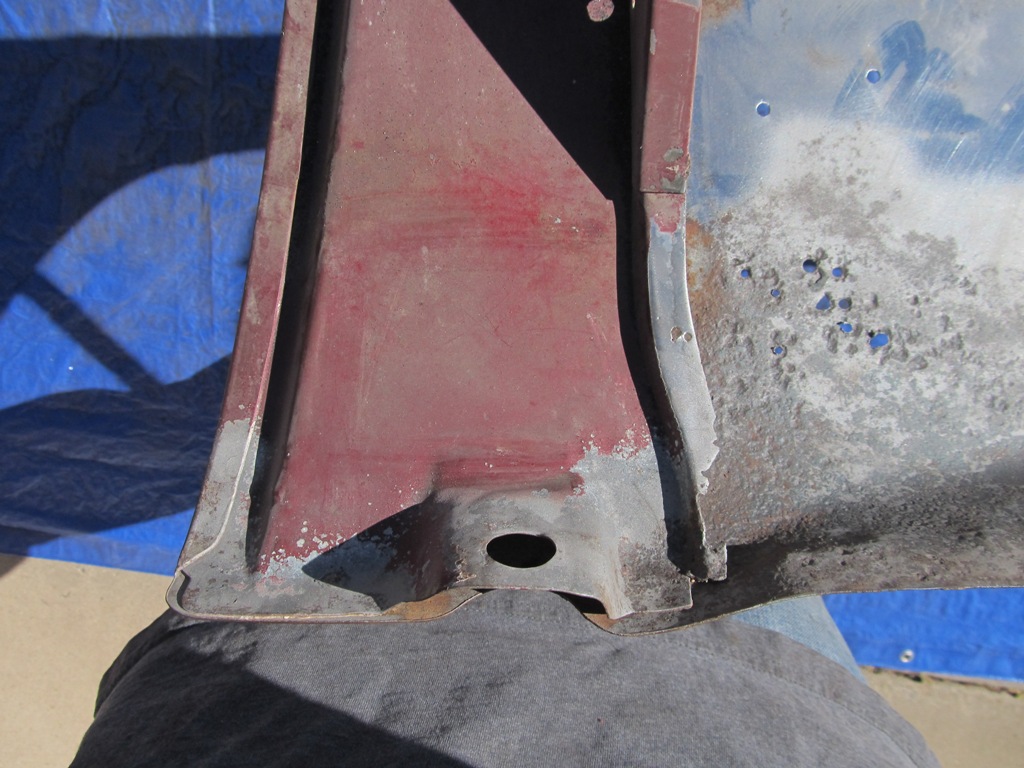
The pitting appears to go under the fender brace at the rear edge of the fender. So I have to cut it out and see what's underneath. One spot weld and a couple of cuts...

...and we find the damage doesn't extend too far under the brace. The brace has some real rust cancer on it as well though, so it'll need some help as well.

More blasting to fully see the damage under the fender brace.

I figured the tarp would help keep the mess contained and let me easily recover the used media for another go. I was only blasting about one square foot of metal.

And, we're sweeping, we're sweeping, and sweeping some more. I mean it - no more media blasting in the driveway! I need to find somewhere to take parts for blasting
Comments
Post a Comment
Moderated and checked, albeit infrequently. Humans with real questions get answers, bots with spam get derezzed.