Passenger Side Fender strip & prime
 |
| I still say that's purple... |

The backside of the fender, behind the GT emblems, is in pretty good shape. This is a known problem area for Mustangs where dirt and water get trapped and eventually rust out. The little nubs sticking out on the right side is body filler the previous owner used to fill in the holes where the original Mustang lettering was installed. This fender is an original Ford replacement part (based on a part number I found and failed to get a good picture of) and was apparently not drilled for a GT car. I will weld the non-GT holes shut.

The interior of the front of the fender has some surface rust, but nothing too bad.

More holes and body filler worms where the "289" badge is at the front. Body filler was applied on the outside of the fender, and it would make these little worms on the inside. I would have assumed the inside of the fender would have had some prep work done as well - such as cleaning those up and paint or primer applied. But none of that seems to have happened. Also, it looks like it took a couple tries to get the badge placed right. So now I have even more holes to weld shut.
 |
| The plan - because lists are cool! |

The badges, rubber bumpers, and brackets are cut off the fender

The Apprentice is excited to try the straight razor technique for stripping paint. We set the fender in the sun to warm up the paint and tried it. It worked pretty well for the top layer, but not the underlying primer. Plus it'll nick the metal if one isn't very careful around the curves.

So, the right answer is to get a sander. In our town, we're hard pressed to find a media blaster that instills any confidence in doing a proper job of it, so we chose sanding. The Makita 9227C was recommended by others who've done this before. So I waited for a sale and picked one up online. It's a buffer/sander that uses 7" discs and, most importantly, has variable speed control and a locking trigger. Sanding should be done slower than full speed so as not to warp the thin metal.

The Apprentice tries out the Makita with some quality 3M adhesive 80 grit sanding disks. Much better than the straight razor method, he reports.

After less than an hour, the fender is almost down to bare metal

To finish the job on the inside of the fender, I use these 3M stripping disks on a die grinder. $10 a pop, so be careful, but they work great.

After stripping the inside of the fender. The factory primer is still good and tight, so it can stay.


Finished the outside of the fender with the Makita. Now to fill the eight (!) holes from a badge that wasn't supposed to be there. Only three are needed for the badge, and the thing probably isn't supposed to even be there!

The copper backing spoon comes in handy here. I use the spoon on the outside, and fill from the inside. Filling holes in sheet metal isn't easy, but it can be done if you go slow, use several small fills instead of one long hot fill so it doesn't warp the metal. Here's the inside after filling. I'll knock them down a little bit later on.

Here's the filled holes from the outside after some sanding with a DA sander with 80 grit. Body work will have to take care of the rest later.

Same process was used to fill the other holes on the bottom. You can still see the GT holes and the holes for the chrome rocker trim panel. The fender is now ready for primer.
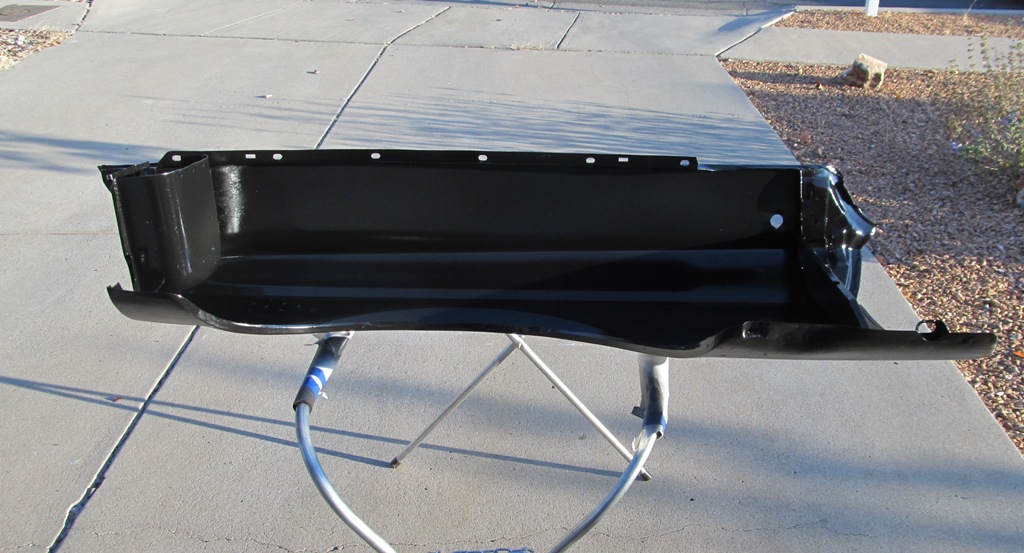
Blamo! Two coats of SPI black epoxy primer later, and it looks like a new part. It came out pretty well for primer. I shot it in mid-November, so I had to wait for late afternoon before the temperature was OK to prime (SPI demands 65F or higher to use). And any little breeze that comes up while you're priming will change the texture you get on the surface. The hole in on the right is for the antenna. I decided to leave it open for now - I can patch that up later if I need to.

Look closely and you see where the holes were filled. That's fine, body work will take care of it later, but I didn't want to work them over too much and possibly thin the metal from over-enthusiastic grinding/sanding the welds.

One down, one to go.This took a total of about 12 hours of actual work. Drivers side fender is next. Then they'll sit like this for a while for test fitting it on the car as we remove and replace structural metal later on. This was quite pleasing to get done. It's a good, tangible project, and starts giving an idea of what clean, new paint might look like.
Comments
Post a Comment
Moderated and checked, albeit infrequently. Humans with real questions get answers, bots with spam get derezzed.